Remote collaboration is increasingly commonplace, with more teams utilizing video conferencing as a primary source of communication. Unfortunately, consumer-grade tools like Zoom aren’t designed for creative professionals, who may run into roadblocks like low resolution when working through a live edit.
To recreate an in-studio experience online, some creatives use NDI (Network Device Interface) within OBS (Open Broadcaster Software) to improve their remote sessions. This approach offers enhanced control of your session’s video and audio outputs beyond Zoom or other conferencing platforms’ defaults.
This article explains how to use NDI to stream your workspace more effectively while interfacing with clients or collaborators. We also examine a few of this method’s potential pitfalls and highlight a robust alternative that offers a seamless remote collaboration experience.
Where you can access NDI
Before using NDI to stream with OBS, download the plugin first. You can acquire NewTek’s NDI for free on the company’s website. NDI acts like a virtual cable, enabling users to send and receive audio, video, and other media over a local network.
You should also download the core NDI tools, such as the Access Manager, which allows you to configure your NDI sources. Additional core tools include Screen Capture for Windows and Scan Converter for Mac users to cast your screen over the local network.
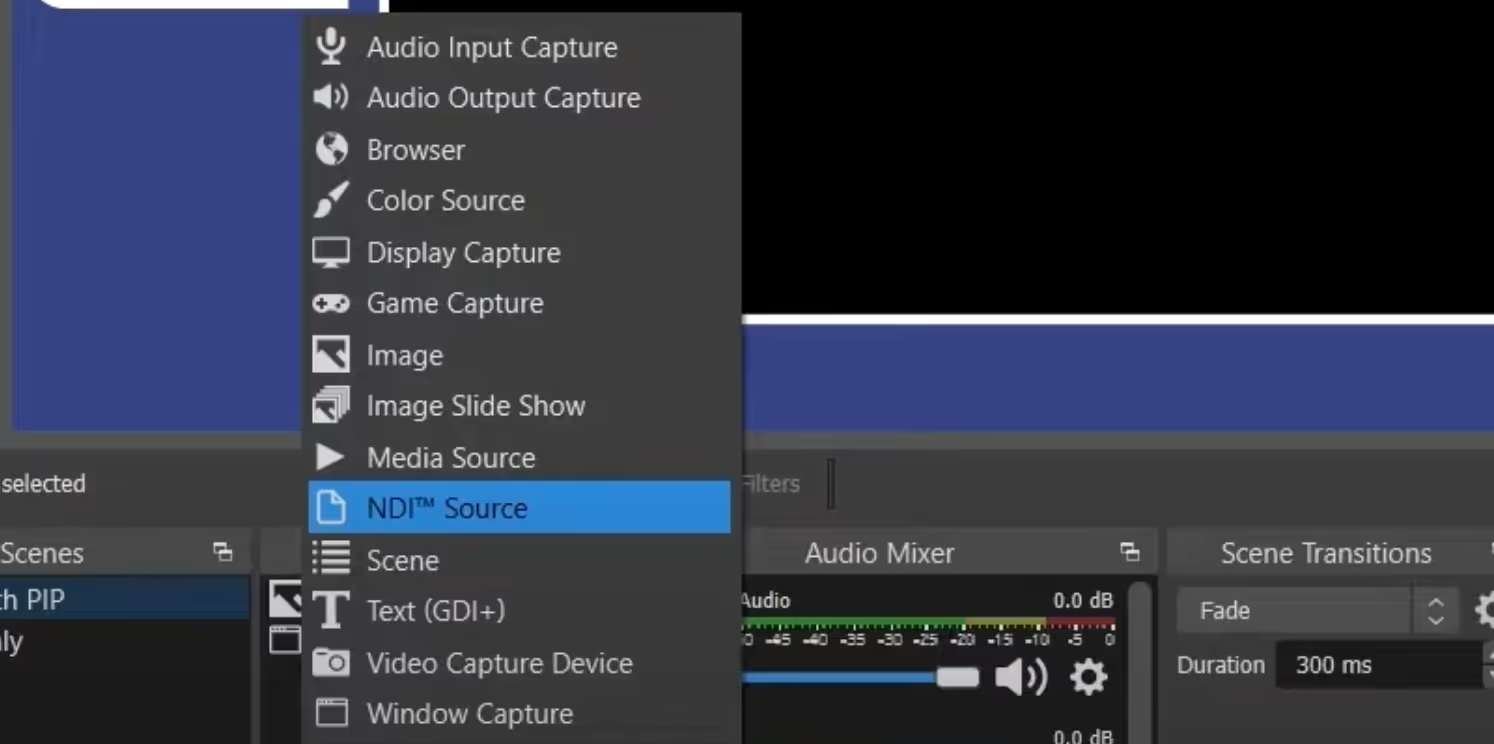
Then, download the OBS NDI plugin, which you can find here. This free plugin integrates into OBS, which lets you stream your workspace over video conferencing tools like Zoom and other platforms. The NDI plugin installation is complete when “NDI source” appears in your list of source options within OBS.

The OBS virtual camera function provides direct integration into several common conferencing tools for convenience. However, you may need to adjust settings within Zoom, Google Meet, or other conferencing software before you can live stream the OBS virtual camera respectively.
How to use NDI and OBS to stream a session
If you’ve ever tried to run a CPU-heavy program with consumer-grade conferencing tools, you’ve probably experienced some lag. This lag could be within the stream or the program workspace itself and results from your computer dividing resources between the two sources.
NDI’s main benefit is your ability to stream several devices simultaneously over a local network. Essentially, NDI maximizes the performance of several devices or tasks without requiring a capture card.
For instance, say you have two devices, one focused on editing in Adobe’s Premiere and another dedicated to video conferencing and interfacing with the client. You can send the editing feed to the conferencing source without compromising the performance of either device.
Assuming you have the prerequisite downloads mentioned above, you can start by opening the NDI Access Manager to set your sources. If you have multiple devices, repeat this step on each device as needed. You must set each device to the same IP address for successful communication.
Next, open up OBS. To add an NDI source, click the + under the sources window and choose NDI Source. You should be able to select any sources you set up within the NDI access manager.
You can edit which displays, audio, and video sources to show in your stream alongside your NDI source(s) within OBS. Once you’re happy with your OBS configuration, you can stream directly using the OBS stream key or the Virtual Camera to integrate directly into Zoom.
A better alternative: Use Evercast
You can use NDI alongside OBS Studio and Zoom to collaborate with clients and team members, though the process can take some getting used to. That said, a virtual camera setup also has some significant limitations that may make this workflow unsuitable for performance on high-level projects.
For example, operating across several components leaves a significant margin for error, even for the most tech-savvy creators. That can lead to costly mistakes when presenting with clients.
Also, while NDI can separate the CPU burden across several devices, it still depends on a local network for filtering through OBS and external video conferencing tools. That can create unnecessary latency since these mass-market software suites aren’t optimized for top-tier creative workflows.
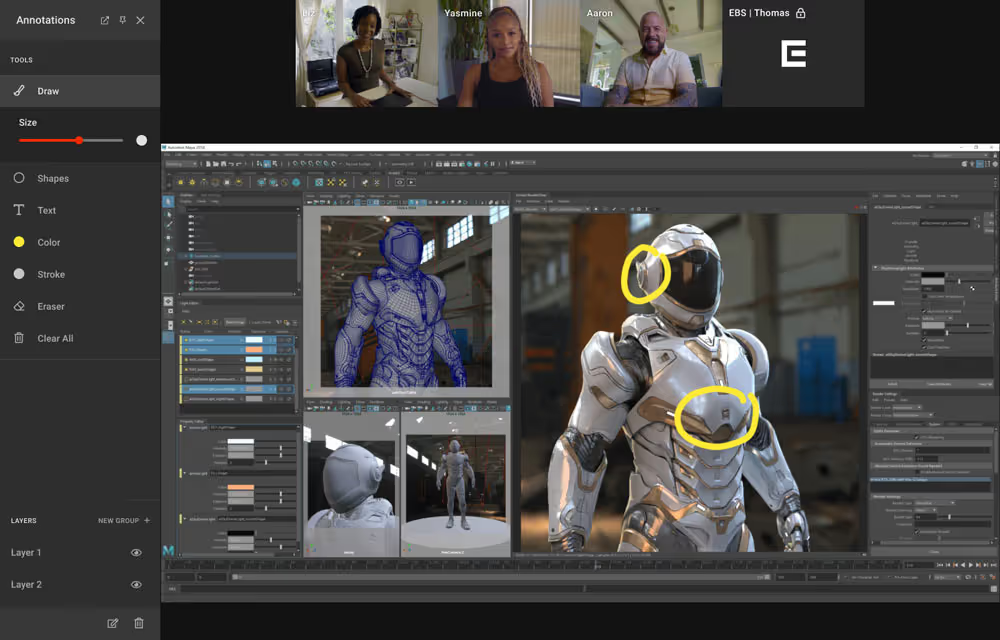
Evercast offers an all-in-one solution for creative professionals with built-in video conferencing and 4K, color-accurate, ultra-low latency streaming. Additional collaboration features include chat, drawing, and recording . Session participants can join your virtual room at the click of a button, instantly gaining access to your collaborative session.

Built by creative professionals for creative professionals, Evercast offers high resolution and reliable audio/visual quality, with 10-bit 4:4:4 color depth and up to 7.1 surround sound, making it easy to finalize studio projects remotely. Collaborators can review streams in a true 1-to-1 setting.
Create together remotely, in real time

Whether you’re working through initial drafts or finalizing color, Evercast supports creative collaboration at any stage of the production process. With interactive file playback, anyone in the room can play, pause, and scrub through assets. You can also record sessions, which log all interactions for future review.
With 24/7 white-glove support and a dedicated security team, Evercast has the approval of all major studios worldwide. The platform also offers invite-only access and multi-factor authentication features to keep sensitive assets confidential from start to finish.

Evercast takes the guesswork out of facilitating a high-grade collaboration session, seamlessly integrating within any workflow. Though OBS and NDI can provide additional flexibility for streaming live sessions, this method doesn’t support the infrastructure for a true remote collaboration workflow.
Backed by the world’s top studios, game developers, creative agencies, and brands, Evercast delivers the ideal online environment for serious creative professionals.
Learn more about how Evercast can improve your remote workflows.


